Note: This page is subject to change during the 2019.1 beta cycle.
Unlit shader
Use this shader for stylised games or apps that do not require direct lighting. Because of the lack of light calculations, you can expect high performance from these games.
Using the Unlit shader in the Editor
To create a new Material with the shader: 1. In your Project window, click Create > Material. Select the Unlit shader.
To select and use this shader: 1. In your Project, create or find the Material you want to use the shader on. Select the Material. A Material Inspector window opens. 2. Click Shader, and select Lightweight Render Pipeline > Unlit.
UI overview
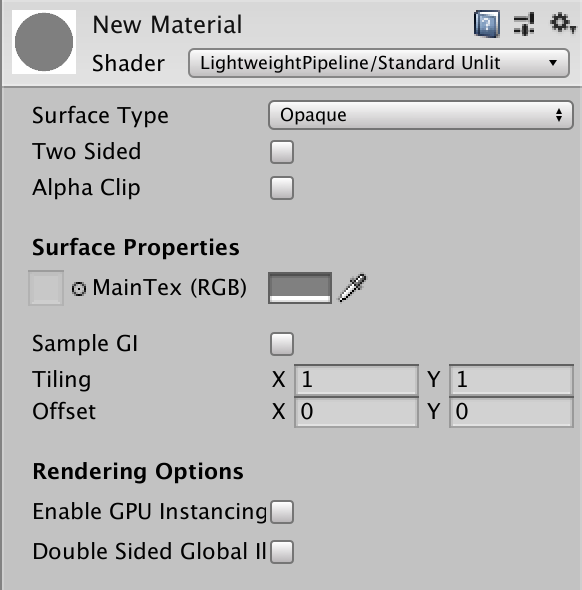
The Inspector window contains these elements:
You can read more about each section in the following overviews.

Surface Options
The Surface Options control how the Material is rendered on a screen.
| Property | Description |
|---|---|
| Surface Type | In this drop-down menu, choose between an Opaque or Transparent surface type. Opaque surface types are fully visible, without any considerations of what’s behind them. Transparent surface types take their background into account, and they can vary according to which type of transparent surface type, you choose. If you select Transparent, a second dropdown appears (see Transparent property description below). |
| Transparent surface type | Alpha uses the alpha value to change how visible an object is. 1 is fully opaque, 0 is fully transparent. Premultiply applies a similar effect as Alpha, but only keeps reflections and highlights, even when your surface is transparent. This means that only the reflected light is visible. For example, imagine transparent glass. Additive adds an extra layer on top of another surface. This is good for holograms. Multiply multiplies the colors behind the surface, like colored glass. |
| Two Sided | Enable this to render on both sides of your geometry. When disabled, Unity culls the backface of your geometry and only renders the frontface. For example, Two Sided rendering is good for small, flat objects, like leaves, where you might want both sides visible. By default, this setting is disabled, so that Unity culls backfaces. |
| Alpha Clip | Enable this to make your Material act like a Cutout shader. With this, you can create a transparent effect with hard edges between the opaque and transparent areas. For example, to create straws of grass. Unity achieves this effect by not rendering Alpha values below the specified Clip Threshold, which appears when you enable Alpha Clip. |
Surface Inputs
The Surface Inputs describe the surface itself. For example, you can use these properties to make your surface look wet, dry, rough, or smooth.
| Property | Description |
|---|---|
| MainTex | This is the color of the surface, also known as the diffuse map. To assign a texture to the MainTex setting, click the object picker next to it. This opens the Asset Browser, where you can select from the textures on your Project. Alternatively, you can use the color picker. The color next to the setting shows the tint on top of your assigned texture. To assign another tint, you can click this color swatch. If you select Transparent or Alpha Clip under Render Properties, your Material uses the texture’s alpha channel or color. |
| Sample GI | With this enabled, you can create a surface that uses Light Probe data to add ambient lighting. When enabled, the Normal map setting appears. Here, you can assign a tangent-space normal map, similar to the one in the Standard Shader in the built-in render pipeline. To read more about tangent-spaced normal maps, see this article on Polycount. If you do not enable Sample GI, the render pipeline considers ambient as white and skips sampling the Light Probe data. |
| Tiling | A 2D multiplier value that scales the texture to fit across a mesh according to the U and V axes. This is good for surfaces like floors and walls. The default value is 1, which means no scaling. Set a higher value to make the texture repeat across your mesh. Set a lower value to stretch the texture. Try different values until you reach your desired effect. |
| Offset | The 2D offset that positions the texture on the mesh. To adjust the map position on your mesh, move the texture across the U or V axes. |
Advanced
The Advanced settings affect the underlying calculations of your rendering. They do not have a visible effect on your surface.
| Property | Description |
|---|---|
| GPU Instancing | Make Unity render meshes with the same geometry and Material/shader in one batch, when possible. This makes rendering faster. Meshes cannot be rendered in one batch if they have different Materials or if the hardware does not support GPU instancing. |
| Double Sided Global Illumination | Make the surface act double-sided during lightmapping. When enabled, backfaces bounce light like frontfaces, but Unity still doesn’t render them. |